Adding System Fields to the Document Grid View

This BluePrint guides you through adding system fields to the Document Grid View. By using Batch Edit, you can add a system field to the Document View in an editable format.
To add system fields to the Document Grid View
- Import the files you want to work into ReadySuite.
- In the ReadySuite ribbon Home tab, click Batch Edit.
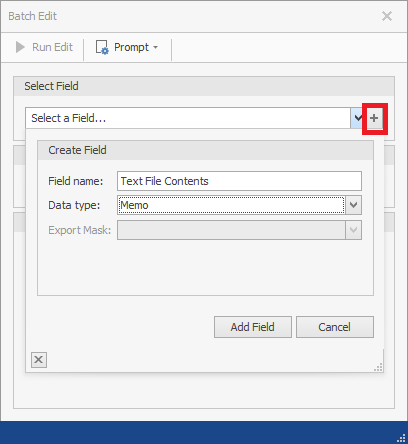
- In the Batch Edit dialog box, in the Select Field section click the Add button
 and in the Create Field dialog box, enter the Field name (example
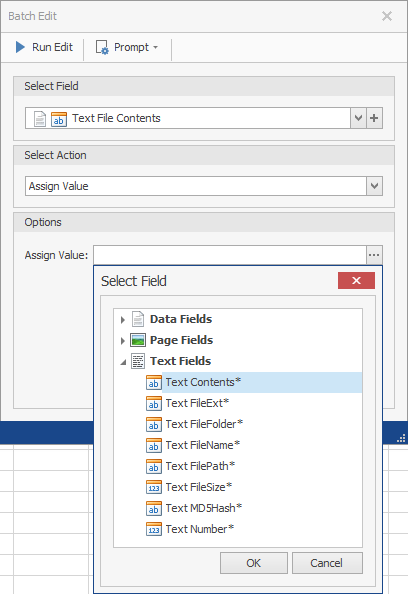
 Text File Contents) and select the Data type (exampleMemo) of the new field, then click Add Field. - In the Select Action drop list, choose Assign Value.
- In the Options section, click the Action drop list to open the Select Field list and choose the system field you want to map to the Document Grid View (example Text Fields >
Text Contents), then click OK. - On the Batch Edit dialog box header, click Run Edit.
- View the newly created field on the Document Grid view as an editable field.